Forms Lab (User Input Form)
Objective
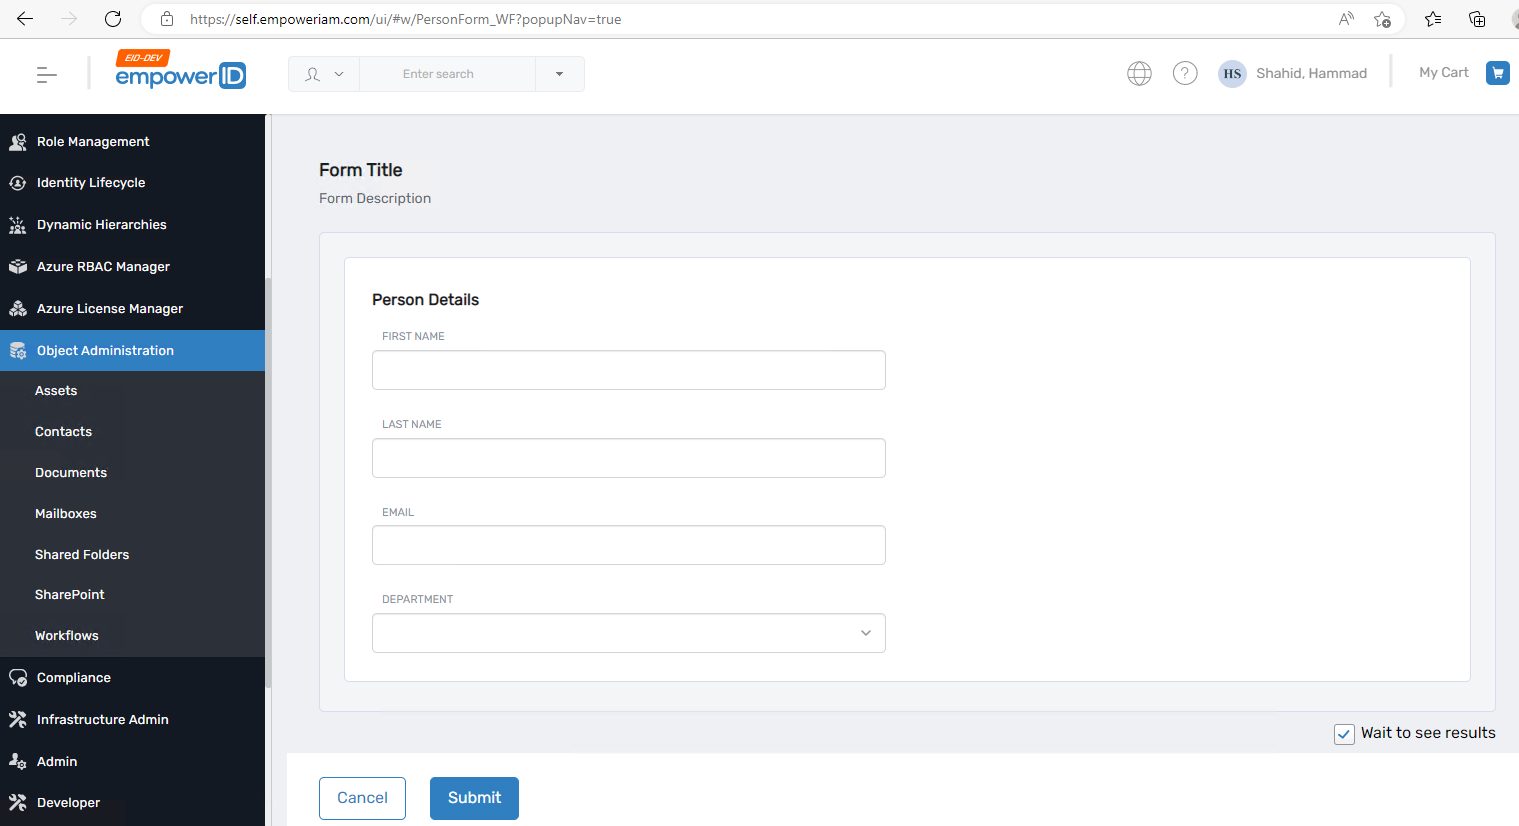
Create a Form
- Has only one tab: Person info
- Has only one section: Person Details
Person Details section should include these fields:
- first name
- last name
- department (where the department is a dropdown list that is bound to a static data source).
Credentials:
- User ID: Test
- Password: P@$$w0rd
Steps:
-
Start the 20331B-NYC-DC-05 virtual machine. Wait for the virtual machine to display the Desktop.
-
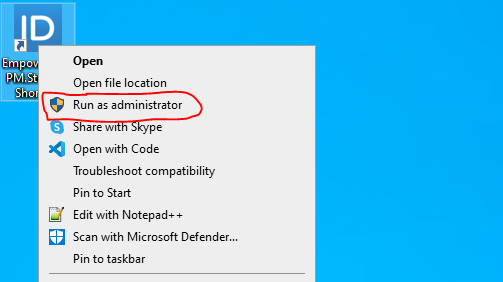
On your Desktop, Right-click Workflow Studio (WFS), and then click Run as administrator.
-
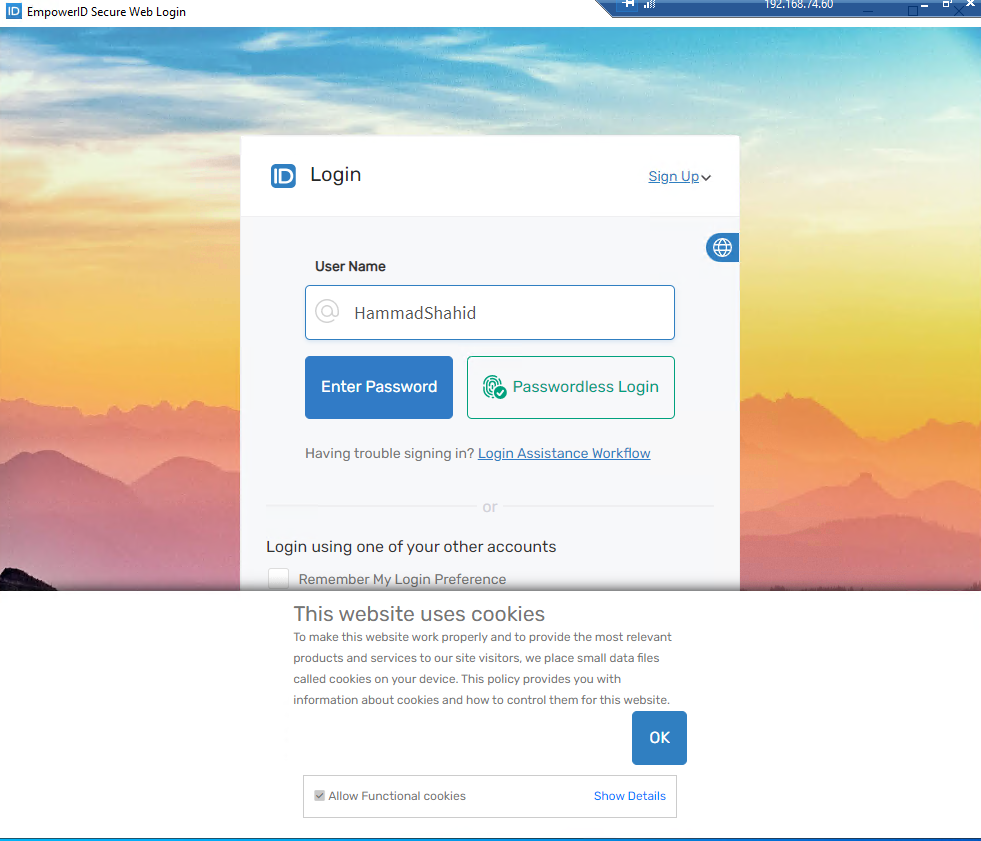
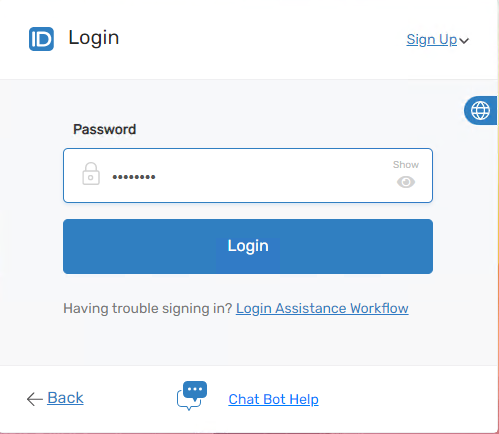
Wait for WFS to start and enter your credentials.
-
In Solution Explorer, right-click on the Developer Packages folder, create a new folder called DemoLabs, and click the Ok button.

-
Add New Folder dialog box will appear. From it, select the following options:
- User Interface > Lookup Control
- User Interface > Forms
- User Interface > UI Pages
- Workflows > Applications
- And click the Ok button.

-
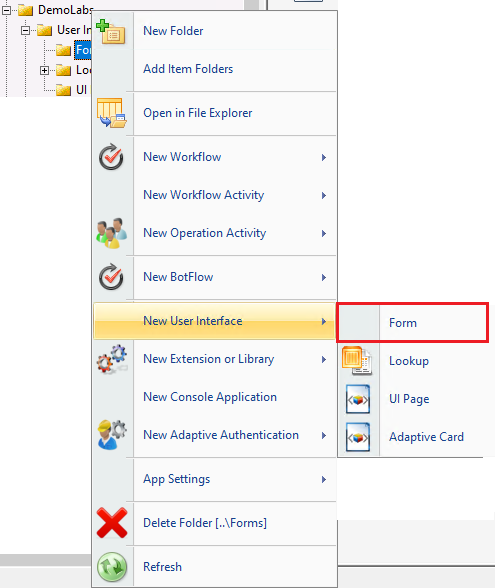
Expand the Developer Packages folder, find the DemoLabs folder, expand it, then under the DemoLabs folder, expand the User Interface folder, right-click on the Forms folder, hover your mouse on the New User Interface option, and click on Form.
-
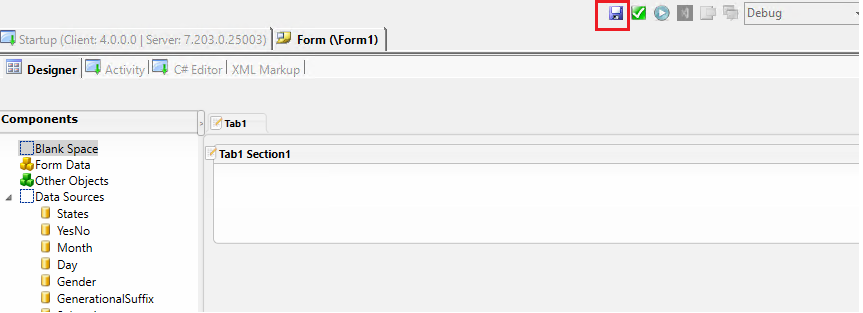
Wait for the Form designer to load.
-
Click on the Save button to save your Form and give it the name PersonForm.
-
Right-click on the Form Data, then click on Add Object and go to the Rbac Components tab. From there, select the Person component and click the Add button.
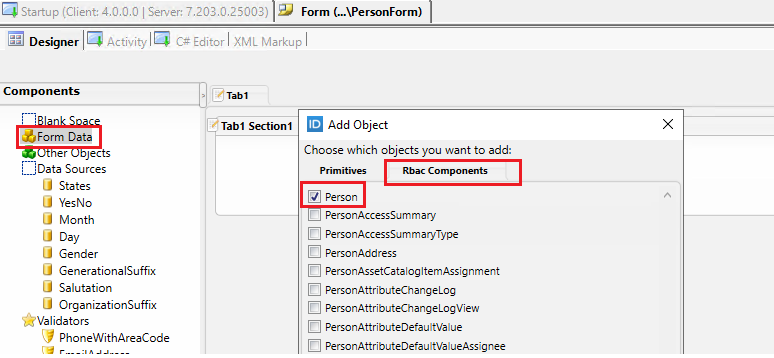
-
Double-click on Person1 and rename it to Person only.

-
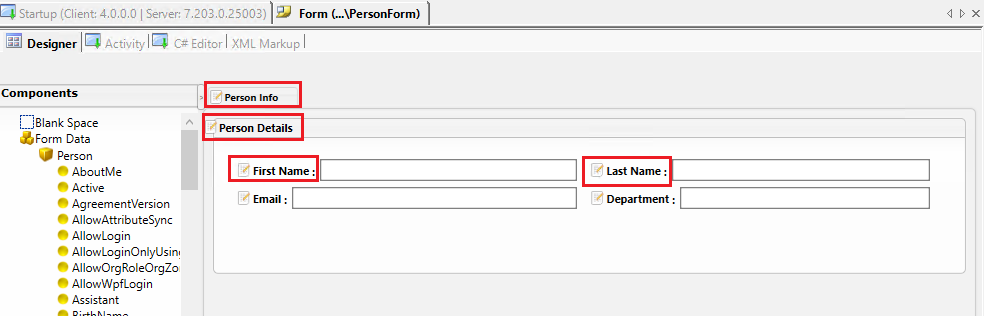
Now expand the person component from left navigation and drag and drop the following fields/columns onto the Form Designer:
- FirstName
- Last Name
- Department

-
Now double-click on Tab1 and rename it to Person Info, then double-click on Tab1 Section1 and give it the name Person Details. Lastly, double-click on the FirstName and LastName fields and put a space between them.
-
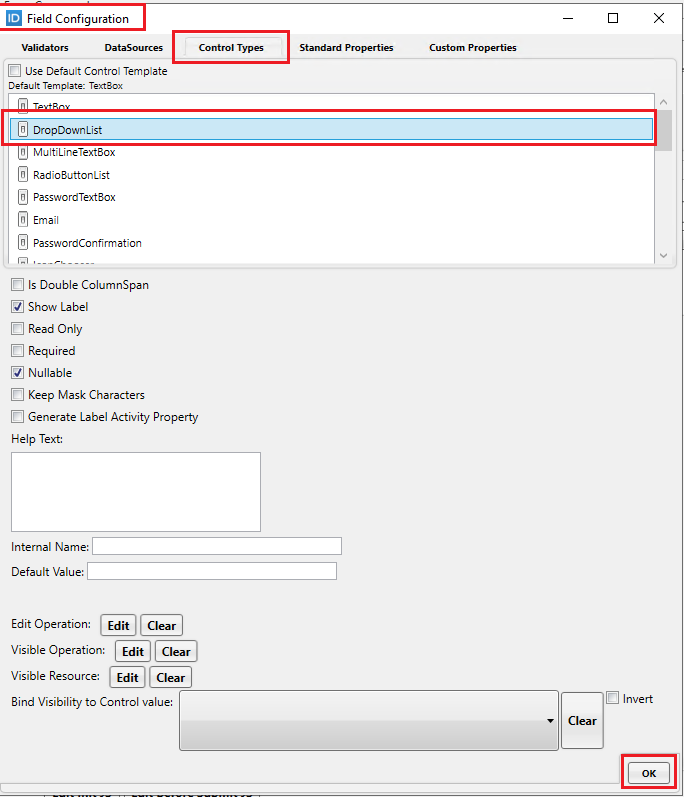
Now right-click on the Department field and click on the Edit option.

-
It will bring up the Field Configuration dialog box. From there, go to the Control Types tab and uncheck the Use Default Control Template checkbox. A list of controls will become enabled; select the DropdownList control and click Ok.
-
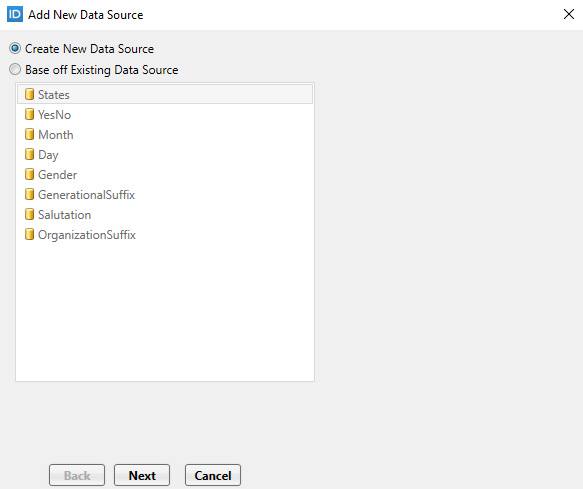
Now right-click on the Data Sources and then click on Add Data Source.

-
From the Add New Data Source dialog box, select the Create New Data Source option and click on the Next button.
-
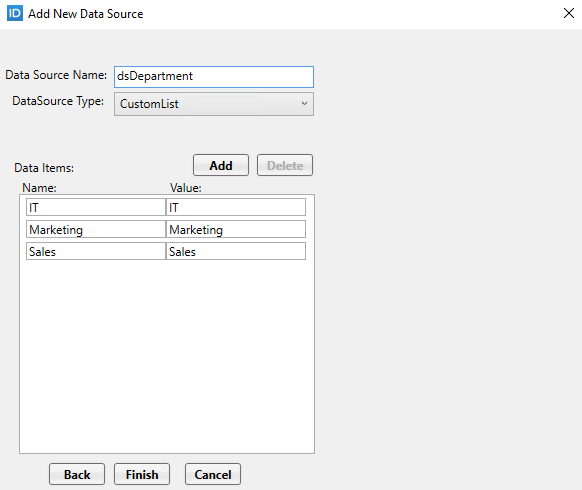
In the Data Source Name textbox, write dsDepartment, select the Custom List option under the DataSource Type, and then click on the Add button and add the following field:
Name Value IT IT Marketing Marketing Sales Sales
Click Finish.
-
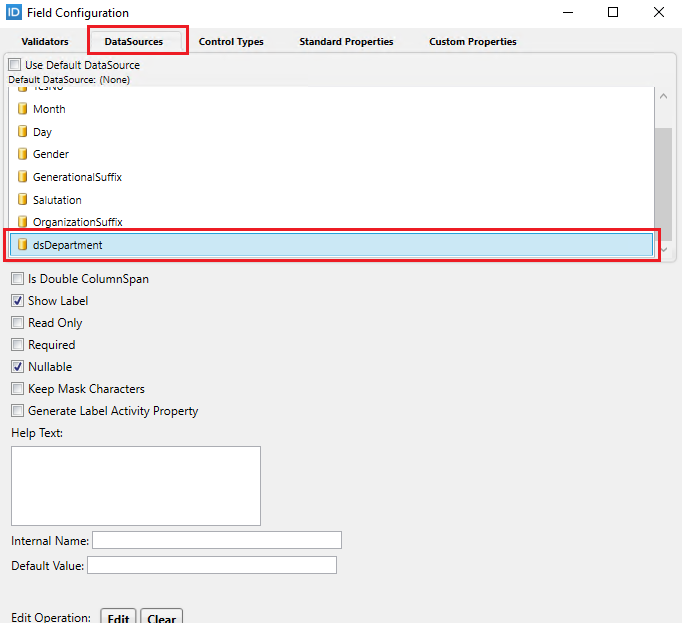
Now right-click on the Department field again and click on the Edit option. Then go to the DataSources tab and uncheck the Use Default Datasource checkbox. Look for your newly created datasource and select it.
-
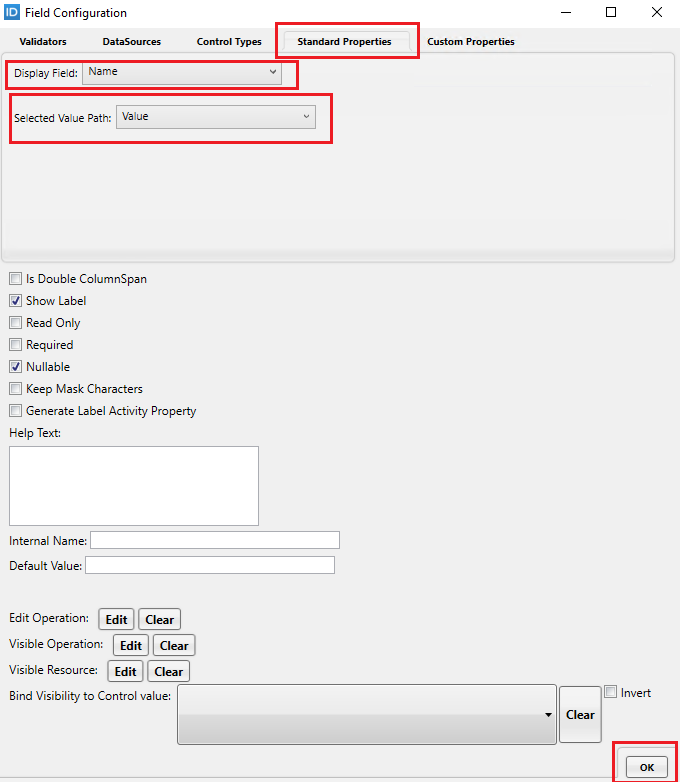
Now go to the Standard Properties tab and in the Display Field dropdown select Name and in the Selected Value Path dropdown select the Value. Click on the Ok button.
-
Now click on the publish button to publish your Form. The publishing dialog box will appear, click on the Next button twice to Publish the Form.
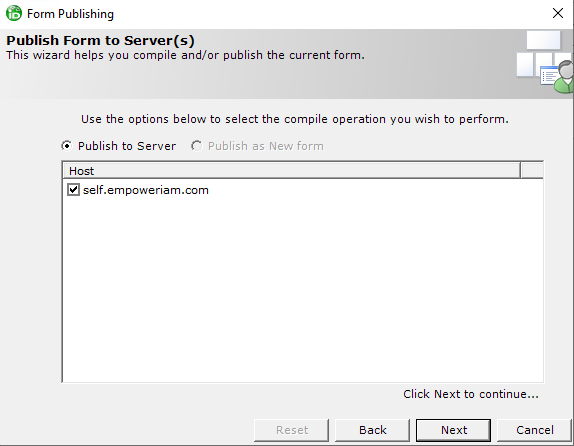
-
Once published successfully, click on the Ok button.

-
Now it will ask you to restart the workflow studio, click on the Yes button.

-
Expand the Developer Packages folder, find the DemoLabs folder, expand it, then under the DemoLabs folder, expand the Workflows folder. Right-click on the Applications folder, hover your mouse on the New Workflow option and click on Flow Chart Workflow.

-
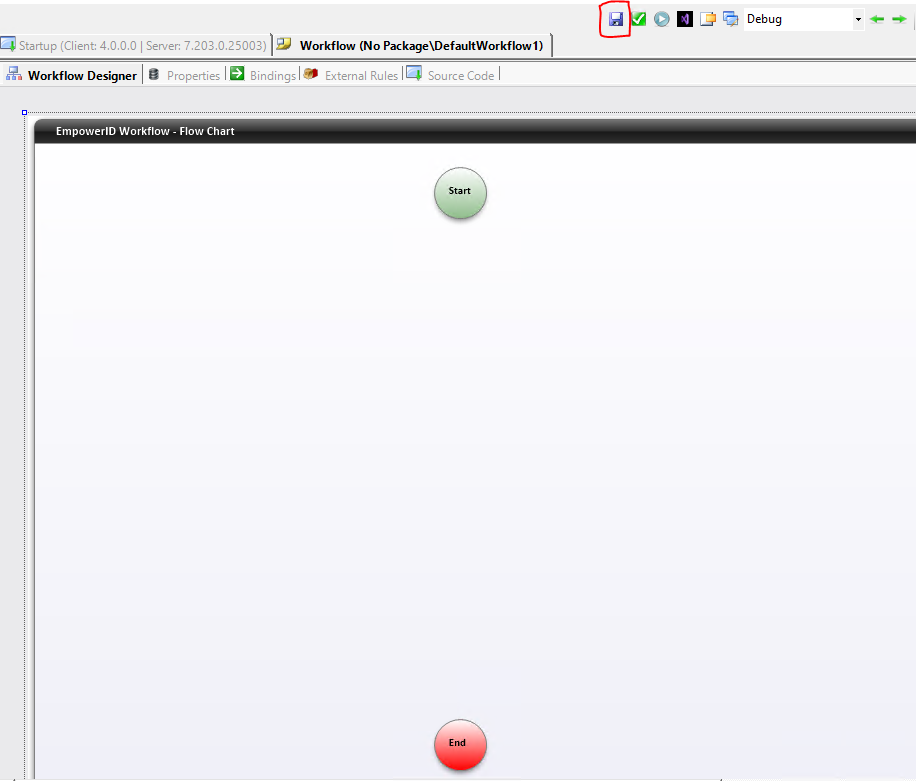
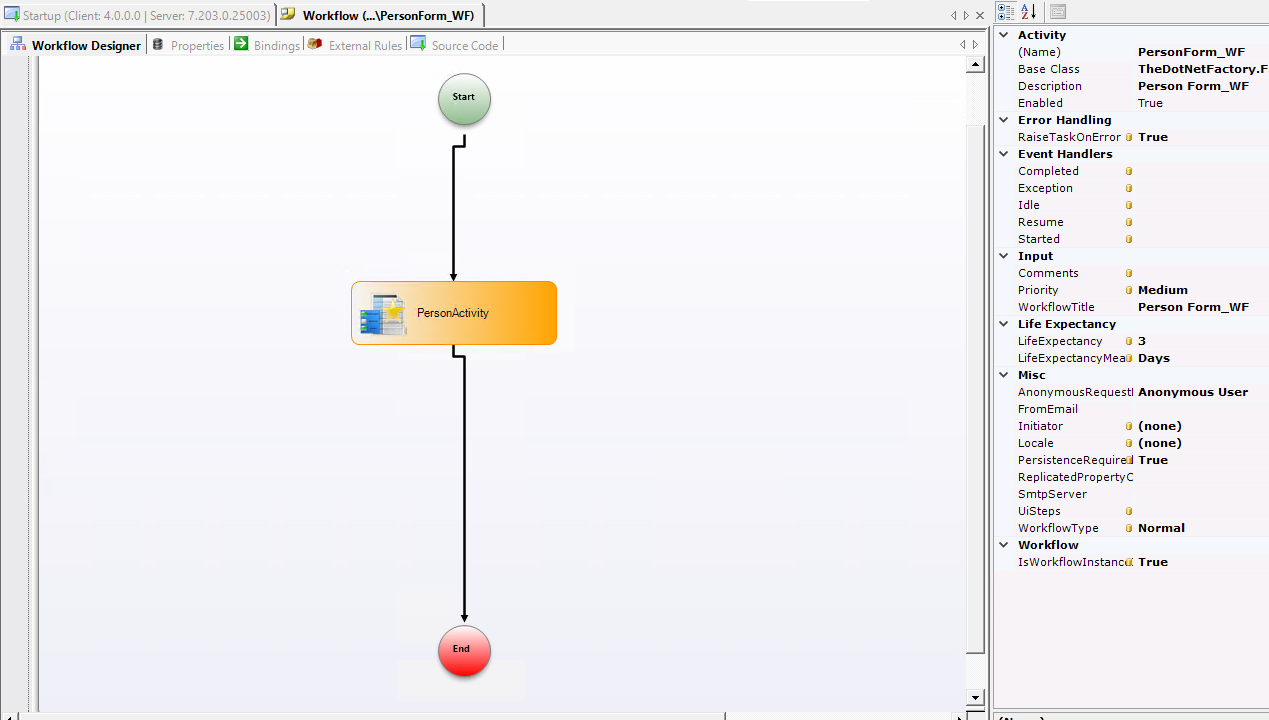
Wait for the Workflow Designer Pane to load. Once loaded, click on the Save button to save your workflow.
-
Give your workflow a name; in this case, PersonForm_WF.
-
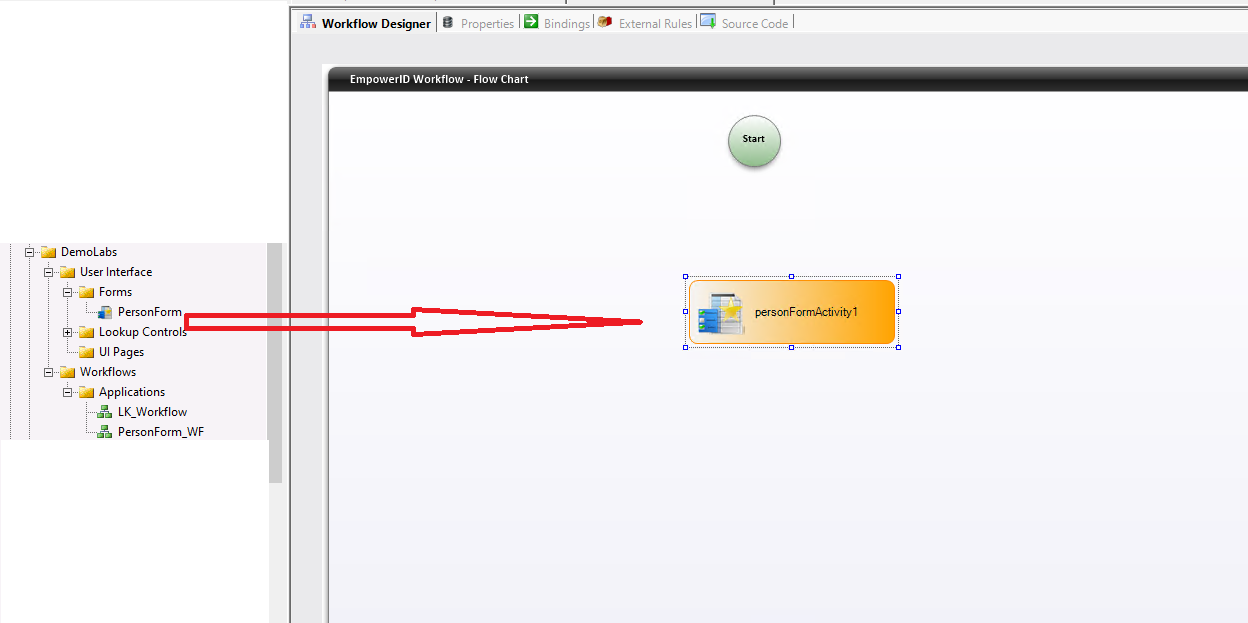
Once saved, drag and drop your Form control activity onto the designer pane of the Workflow.
-
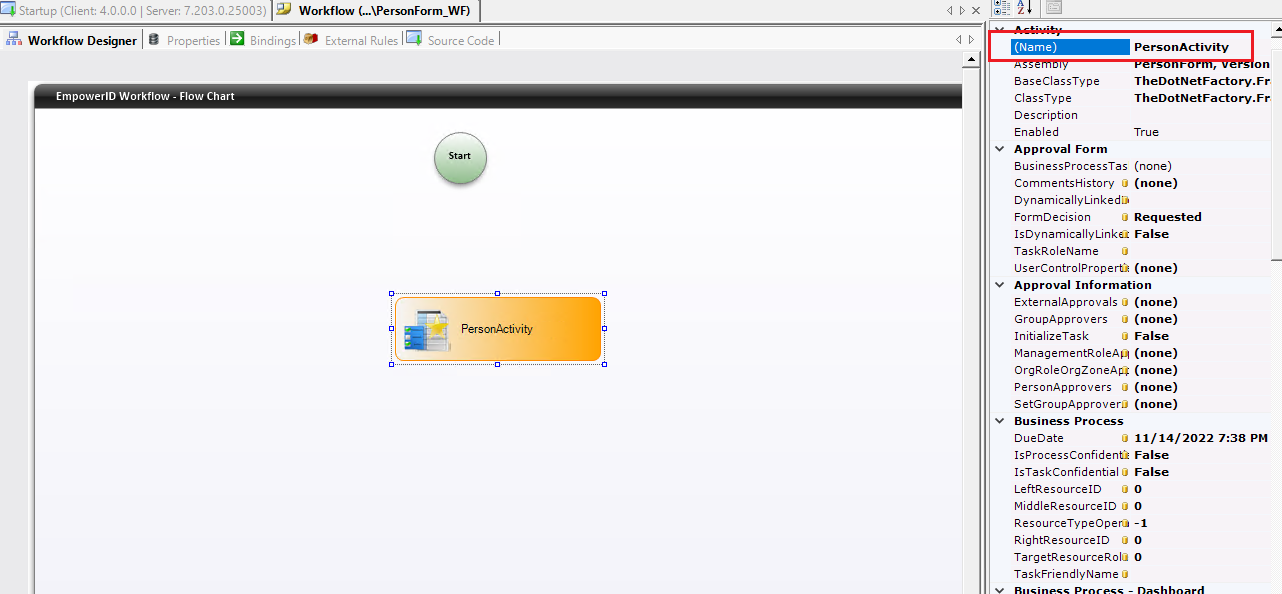
Keep the activity selected. If not selected, then select it, and on the right-hand side, change its (Name) property to PersonActivity.
-
Now click on the start circle, drag the line from it, connect it with your PersonActivity and similarly connect the lines that will come out from your activity to the End circle.
-
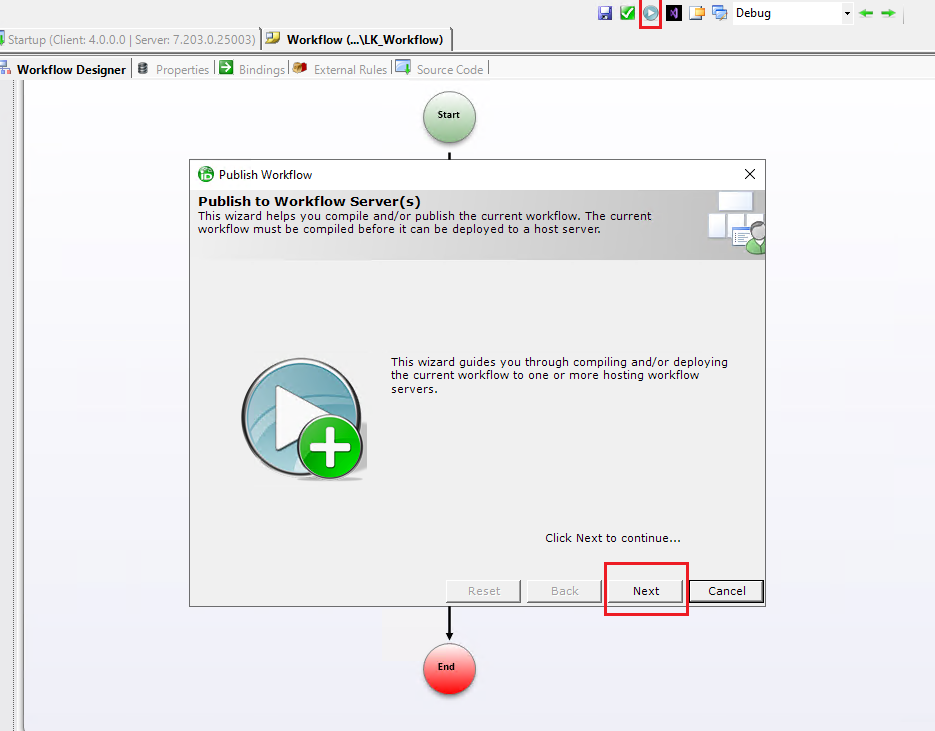
Now click on the publish button to publish your workflow; a dialog box will appear. Click on the Next button twice. Once saved successfully, click on the Ok button.
-
Open Internet Explorer, Edge, or whichever browser is installed on your machine and go to this URL: Login using EmpowerID.
-
Enter the username and password given to you by your lab instructor.

-
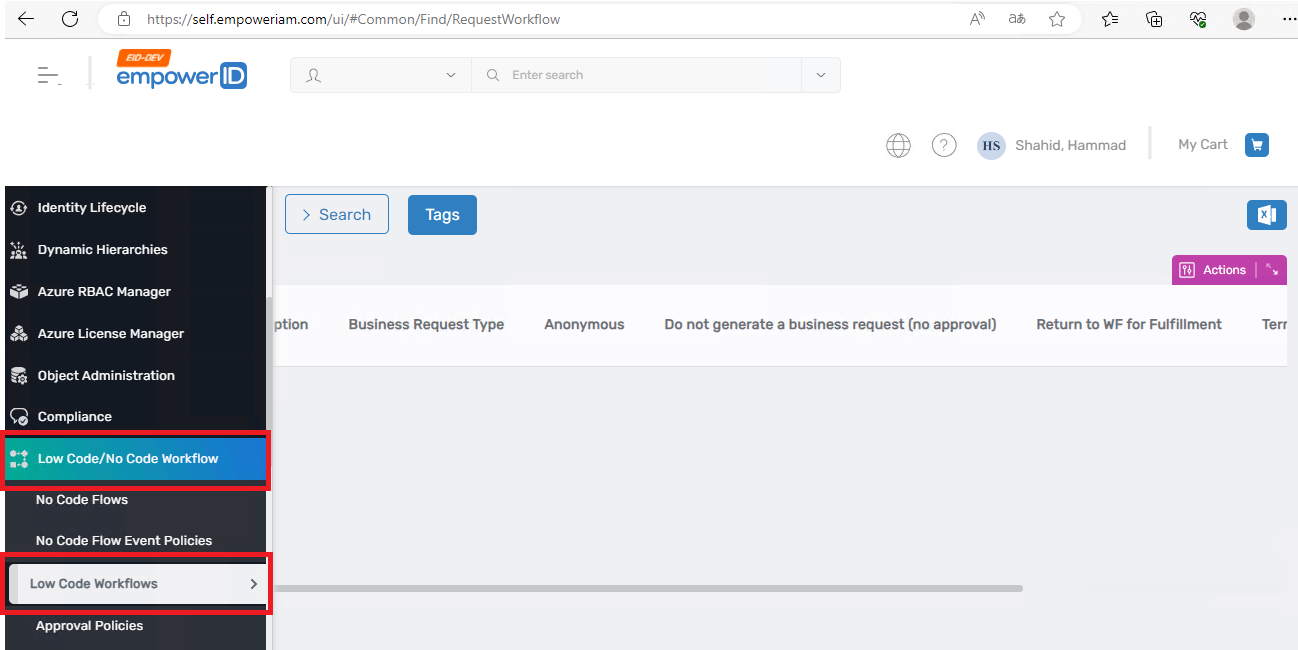
This directs you to your EmpowerID dashboard page. On the left-hand side, click on Low Code/No Code Workflows, and underneath it, click on Low Code Workflows.
-
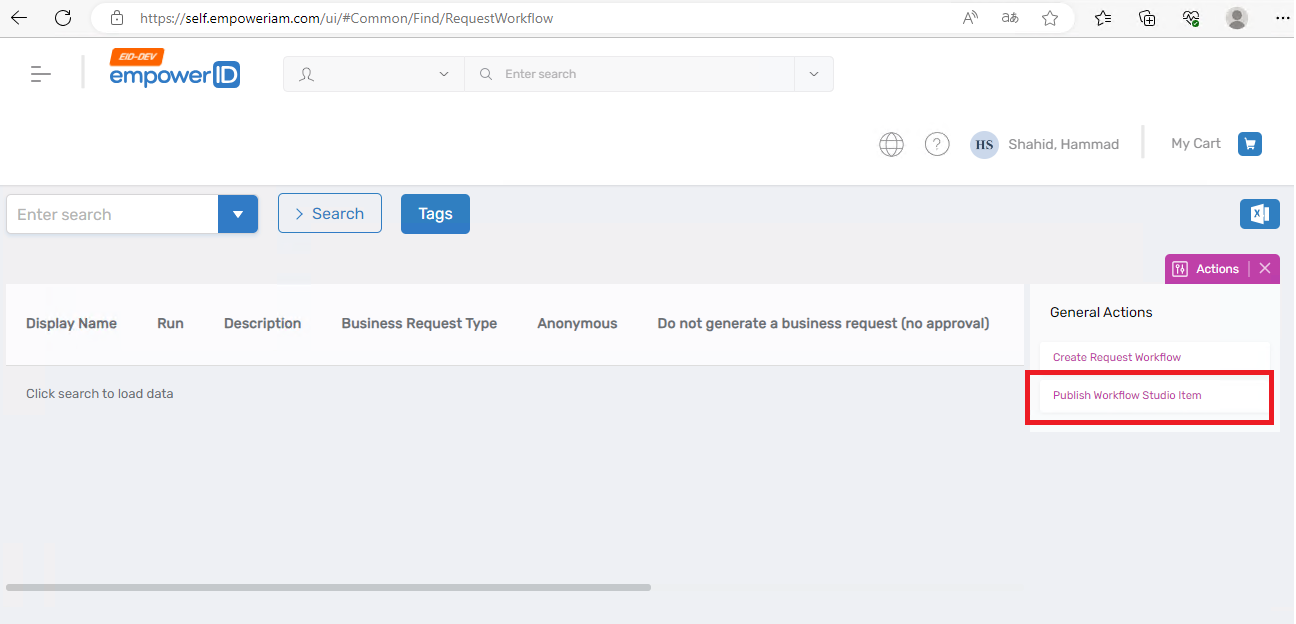
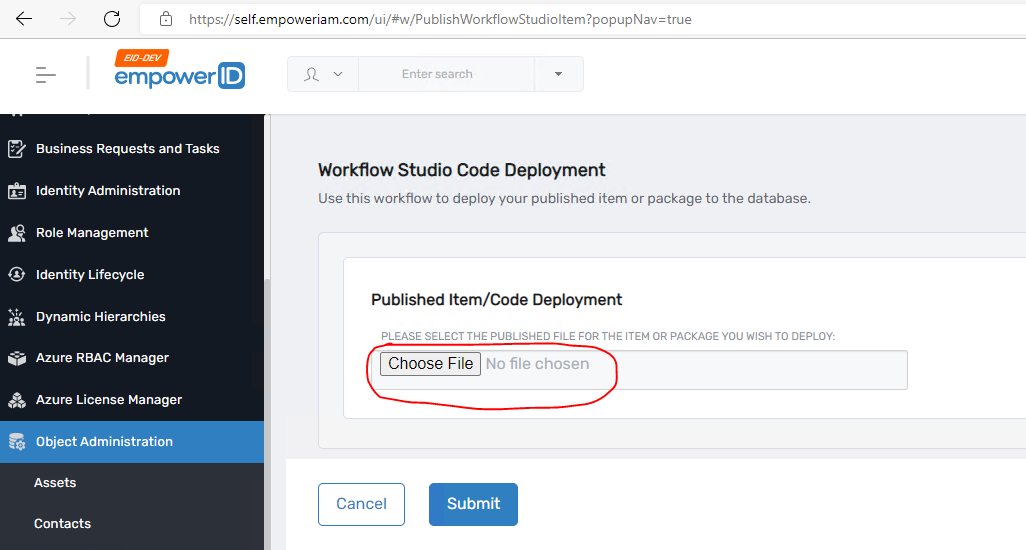
It will take you to the RequestWorkflow page, on the right-hand side of your page, we have an actions pane. Under it, click on the Publish Workflow Studio Item.
-
On the PublishWorkflowStudioItem page, click on choose file, select the .pub file for PersonForm, and then click open file. It will get selected. Now click on the Submit button.
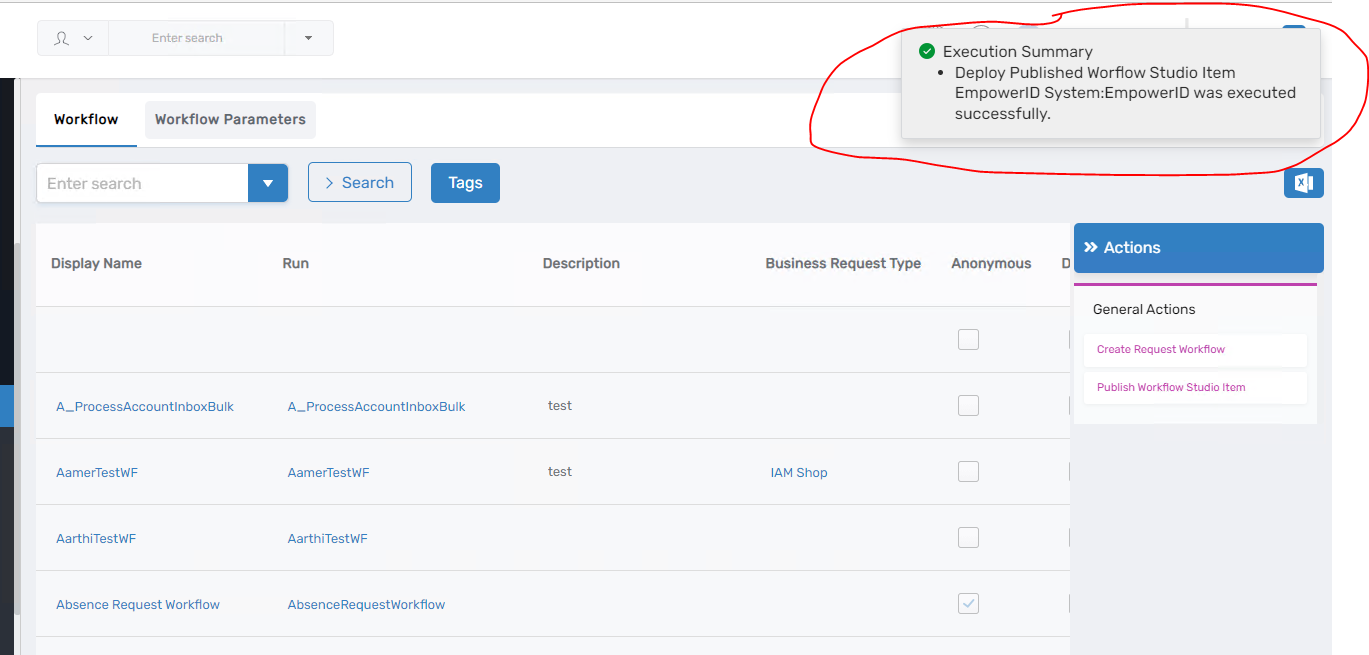
-
You will get this message which tells that deployment is successful.
-
Now click on the Publish Workflow Studio Item again, and this time select the PersonForm_WF published file and hit the submit button to publish it.
-
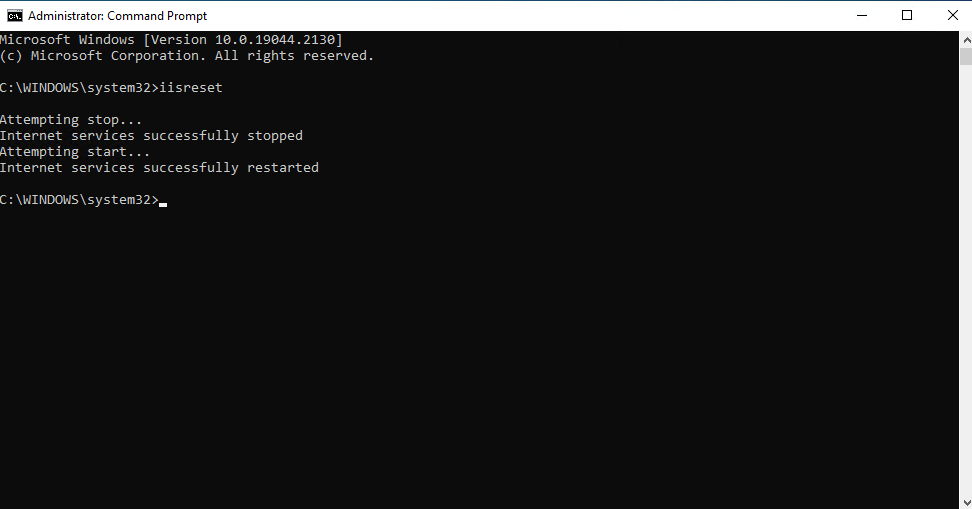
Close your browser and workflow studio and reset the IIS on your machine. Make sure you open Command Prompt in Administration mode.
-
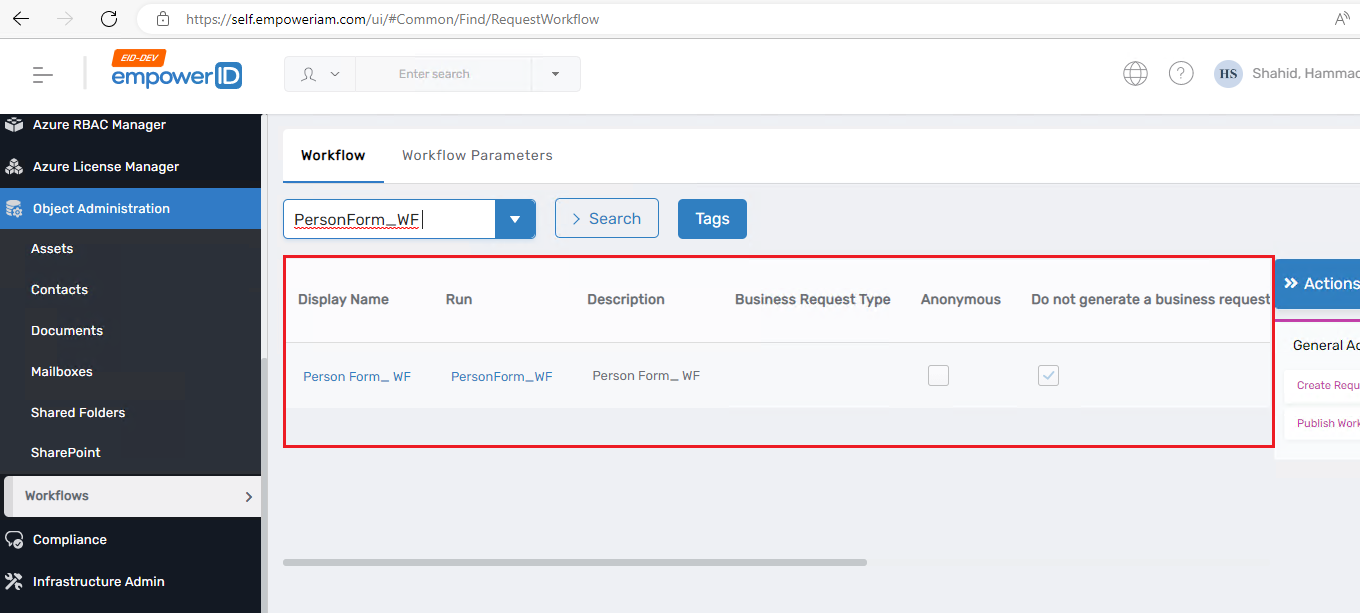
Now open EmpowerID on the browser again, expand the Low Code/No Code Workflows, and underneath it, click on Low Code Workflows.
-
In the search box, type your workflow name PersonForm_WF and hit the search button. Your workflow will appear, click on it under the Run column.
-
Now you can see your Form Control.
-
End